Getting started
Get started with Secorvia
Connect your infrastructure, review your first security scan, and turn cloud security findings into a clear remediation plan.
Reviewed
Before you start
You need an activated Secorvia account, membership in an organization, and permission to connect the infrastructure you want to assess.
Sign in to your organization
Open app.secorvia.com and sign in with your email and password. If you received an invitation, use its activation link to choose your password first. Confirm that the organization is the one you intend to assess.
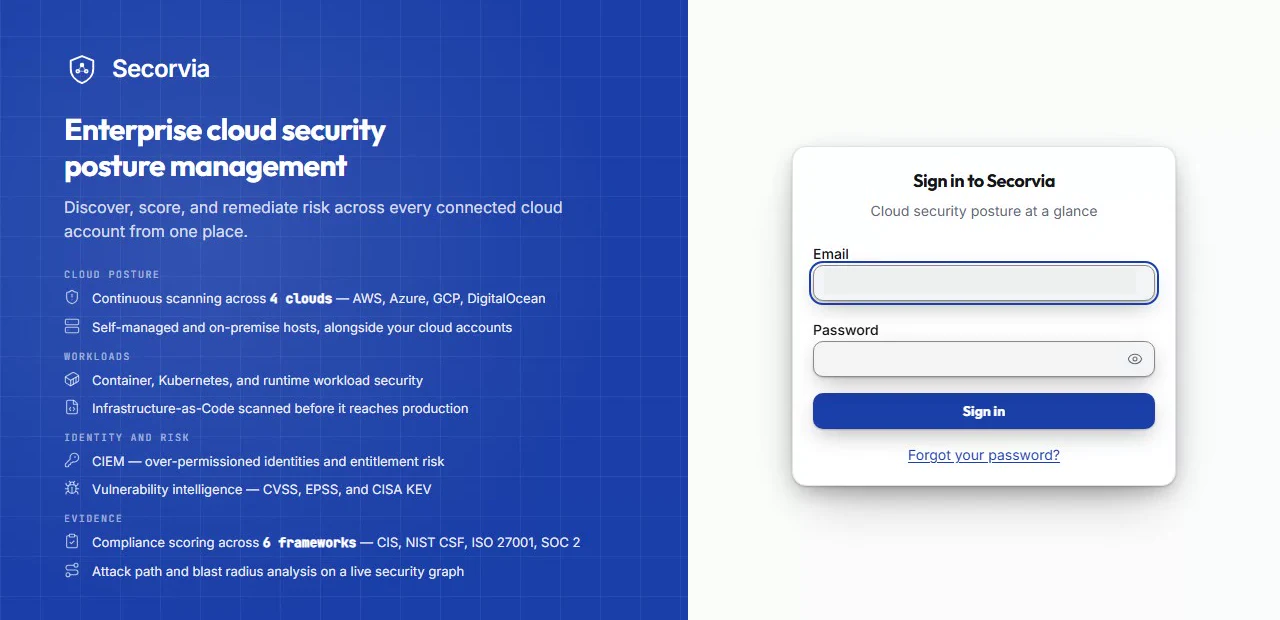
- Email
Enter the email address attached to your Secorvia account. The recorded address has been removed for privacy.
- Password
Enter your password. The eye control at the right lets you check what you typed.
- Sign in
Select Sign in after completing both fields. An invited account must be activated first.
The sign-in form is shown here; invitation activation and organization membership are separate checks.
Product recording: the sign-in form. The email address has been removed.
Connect the infrastructure you want to assess
Open Cloud Accounts → Add Cloud Account for AWS, Azure, GCP, or DigitalOcean. Choose the provider authentication method and enter the requested connection details. For a cluster that pushes inventory outbound, use Kubernetes Security; for a Linux server outside a cloud account, use Self-Managed Hosts.
Wait for the first completed scan
Connecting a cloud account starts the first scan. Open Scan History and check its status. A connected account and a completed scan are different milestones: do not interpret an empty findings list as a clean assessment while collection is still running.
Read the dashboard in context
Open Dashboard. Review Critical Findings and High Findings, then Internet Exposure and Identity Risk. Follow Review critical findings to inspect the affected resources. Check scan coverage so you know how much of the environment these results represent.
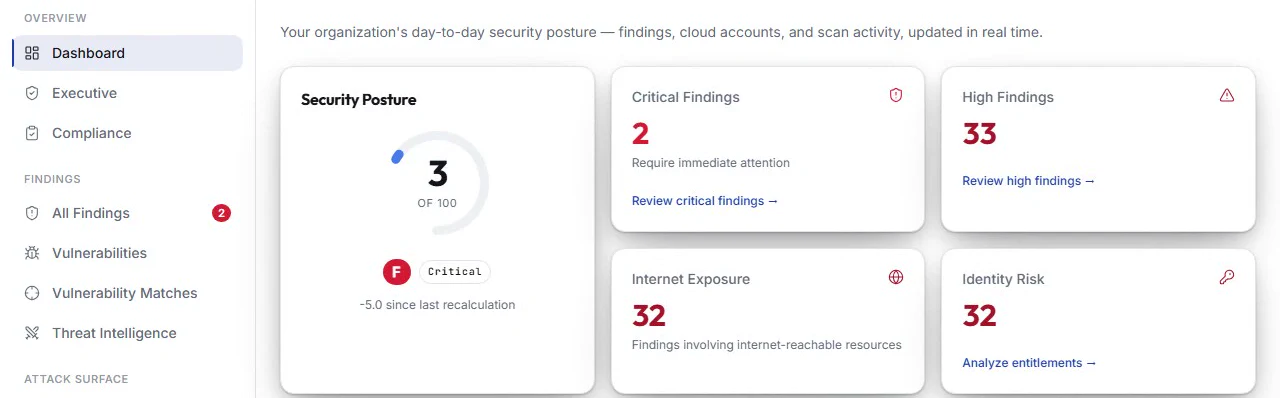
- Critical Findings
Start with urgent findings. Review critical findings opens the underlying findings list.
- High Findings
Review high-severity findings next. This count is separate from critical findings.
- Internet Exposure
Read the number of findings involving internet-reachable resources. Reachability adds context to severity.
- Identity Risk
Use Analyze entitlements to investigate identity permissions in CIEM.
Product recording: the operational dashboard. Figures illustrate the recorded workspace, not your account.
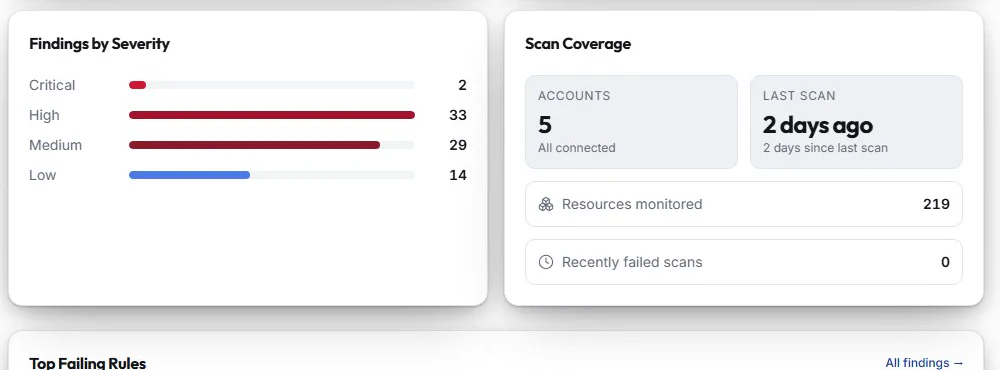
- Accounts
Check how many accounts are connected. A connection alone does not prove that collection finished.
- Last scan
Check the age of the most recent assessment before using its results.
- Resources monitored
Use this count to understand the assessed inventory, rather than assuming every resource is included.
- Recently failed scans
Investigate failed scans in Scan History. Missing collection can make a findings count misleading.
Product recording: check scan coverage before interpreting the findings count.
Investigate, remediate, and verify
Open a finding and read its evidence and remediation guidance. Assign an owner, make the appropriate change in the affected environment, and run a new scan. A finding marked operationally resolved is only verified after a scan no longer reproduces it. See the findings workflow.
Where you are now
Your organization has connected infrastructure, a completed assessment, and a prioritized first remediation task.
WHEN SOMETHING LOOKS OFF
A few things to check
No organization found
Your account is not linked to an organization. Ask your organization administrator to check your membership.
The dashboard is empty
Check Scan History before reconnecting the account. A pending, running, or failed scan has not produced a complete assessment.
PUT IT INTO PRACTICE
Make your next move in Secorvia.
Open the app and follow along with your own organization.